Like a giddy kid on Christmas morning, I couldn’t wait to unwrap offline bounce in Pro Tools 11. The new 64-bit architecture is nice, the smaller installation footprint is great, the expanded meters with a variety of ballistics options are superb, but no new Pro Tools 11 feature is more important for post sound than offline bounce. The future is here, and it is Good™.
Let’s dive into the main feature of Pro Tools 11 that will change the way you work in post sound.
Let’s imagine a typical real-world situation: the music & effects mix for an hour-dramatic action show is completed, and the fully filled effects 5.1 stem has been printed. Now it turns out that the client needs a married music & effects 5.1 stem, an FFX LtRt, and an M&E LtRt. Prior to Pro Tools 11, this meant it was time to start printing for the next 45 minutes. No more! Now you can generate all those stems faster than real-time. Let’s walk through the steps, starting with our source elements:
We’re going to need to create a few busses and auxes to accomplish our goals here. First we need three 5.1-to-LtRt busses; one for the music, one for the FFX, and one for the married M&E. Then we need output busses for all of these things, because offline bounce works by taking a given output or bus and rendering its audio to new files. Let’s go make the busses we need on our I/O page under the Setup Menu, then I/O:

We’ve created all the busses we need, including the paths that we want to use for our offline-bounce.
Now we will create three 5.1 aux tracks and instantiate an LtRt-encoding plugin on each. In this case we will use the Neyrinck SoundCode LtRt. We will bus our audio tracks to our aux tracks, and then bus the outputs of the aux tracks to the various busses we want to use for the offline bounce. Here’s how the mix page looks:
There’s a lot to unpack in that screen shot, so let’s step through it.
First, you can see that the outputs of our two source audio tracks are routed to the inputs of their corresponding aux tracks that have the Neyrinck SoundCode LtRt plugin. I’ve got once instance of the plugin open so you can see how it is configured (they’re all set the same way). That plugin is a 5.1-to-stereo plugin, meaning that it converts the track’s output from 5.1 to stereo. That’s why those auxes have only stereo meters, even though they still have 5.1 inputs.
Next, notice that the two audio tracks also have sends that are going to their “M&E 5.1 Bounce” bus and “M&E 5.1 to LtRt” bus. I could also have multed the outputs to achieve this, but chose sends for illustrative purposes.
The output of each aux track is assigned to the appropriate path that we will use for our offline bounce.
Lastly, you can see four instances of the “Maxim” peak limiter plugin. Each is set the same, just to keep the peaks from clipping. Notice that in order to accommodate the married M&E 5.1 path I’ve created a master fader and instantiated the limiter plugin there. I could also have created an additional aux track instead. Either option is valid, but this method saves me a bus path setup.
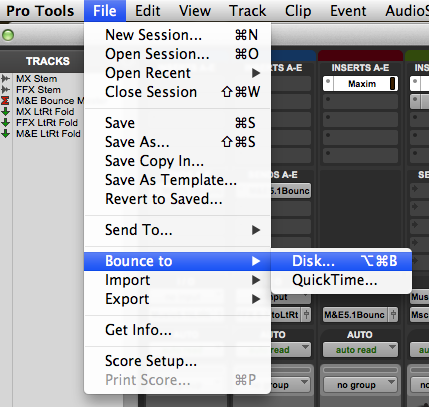
Now that we’ve broken down that monster screen-grab, it’s time to talk about the main event! Let’s bounce our stems faster than real-time! Just make a selection on your timeline for the duration you’d like to bounce, and then follow the same old method of bouncing to disk: go to the File Menu, Bounce To, and Disk:
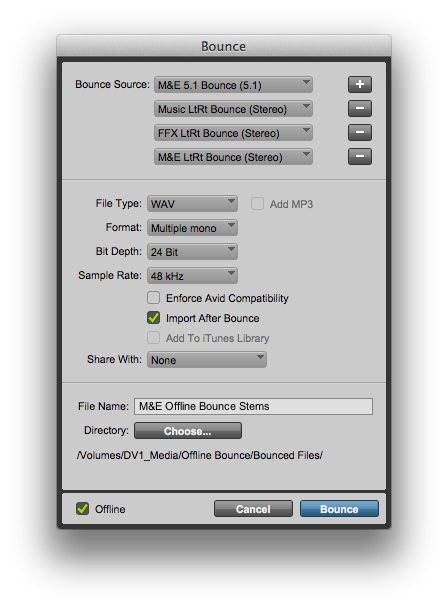
The resulting window has definitely received some modifications:
 The first major change is the Plus button next to the bounce source path. This allows you to select multiple bounce paths at once. We will add one for each bus that we intend to bounce. Next we want to check that new checkbox in the lower left for “Offline.” This is the source of all the magic; if left unchecked, bounce will happen in real-time just like the good old says. If checked, Pro Tools will render the bounced files as fast as your system can manage!
The track and file names of our bounced audio will be a combination of the text entered where it says “File Name” and the bus or output used for the bounce.
We’ve also checked the box for “import after bounce” which will bring the new audio files back into our session once the bounce is complete. Without further ado, hit Bounce!
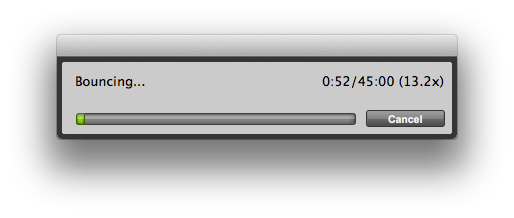
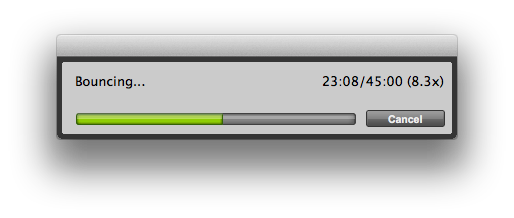
And Pro Tools starts to cook, using all the power it can wrest from your computer. Unfortunately, the bouncing process definitely slows down over time. We started at a healthy 13.2x real time, and by about halfway we’ve slowed to 8.3x realtime:
It still beats the heck out of real-time printing though! All told, this scenario probably averages about 10x real-time. This means that for bouncing stems that are 45 minutes long, it only takes 4.5 minutes. That’s pretty awesome!
Once it’s done bouncing, Pro Tools prompts you to decide how you want to import the newly created audio:
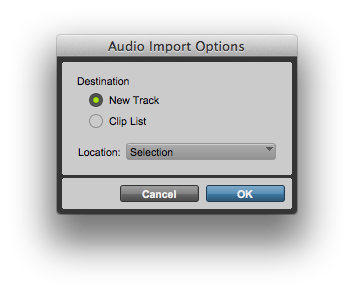 In our case, this default choice is what we want. It will create the new tracks directly beneath your bottom-most selected track. Alternatively we could choose to just place the new media in the clip list, or we could choose to create new tracks but spot the clips to a different position on the timeline.
Once we’ve chosen to bring in our audio on new tracks, Pro Tools creates them. It then calculates the waveform overviews of our new media:
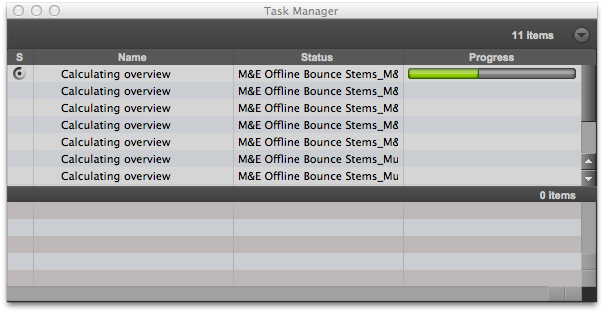 And once it’s all done, we have our shiny new stems!
These new stems are sample-accurate, and are identical in quality to anything we could have generated in real-time. The only thing that might prevent you from using this function is if you use any physical outboard gear as hardware inserts in your session. For instance, if you use an outboard compressor, EQ, noise suppressor, or some other effect, then you must still process things in real-time.
But if all of your processing is done “in the box,” then go ahead and bounce some stems faster than real-time!
Edit 8/10/13: Here’s a quick bonus tip for you! If you are able to set disk cache high enough to load your entire session into active RAM, offline bouncing will run about three times faster!! So for the session demonstrated above, setting the cache to at least 6GB should do it. Then instead of running at 10x, it would bounce at about 30x! So crank up that RAM cache!



Really great tutorial/article…love the details! Thanks!
Alexey,
Just one note about offline bounce: The + option is only available in Pro Tools HD.