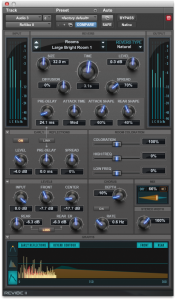
Certain plugins tend to be instantiated many times throughout a mix session. Often you’ll have an EQ on every dialog track. You’ll also frequently have multiple compressors, reverbs, limiters, and other plugins that repeat throughout your template. Sometimes it’s nice to be able to change settings on a single plugin and have other instances of the same plugin change as well. For example, you may want to set your SFX reverb and foley reverb to the same setting each time the show you’re mixing changes locations. Or perhaps all your dialog was recorded too low, and you want to adjust the input trim up on all your EQs to compensate. Going to each plugin individually and making the same changes is time-consuming and inefficient. Fortunately there’s an easy way to set up groups to resolve this problem. Let’s take a look at how we can do this.
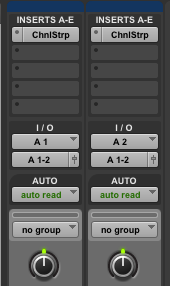
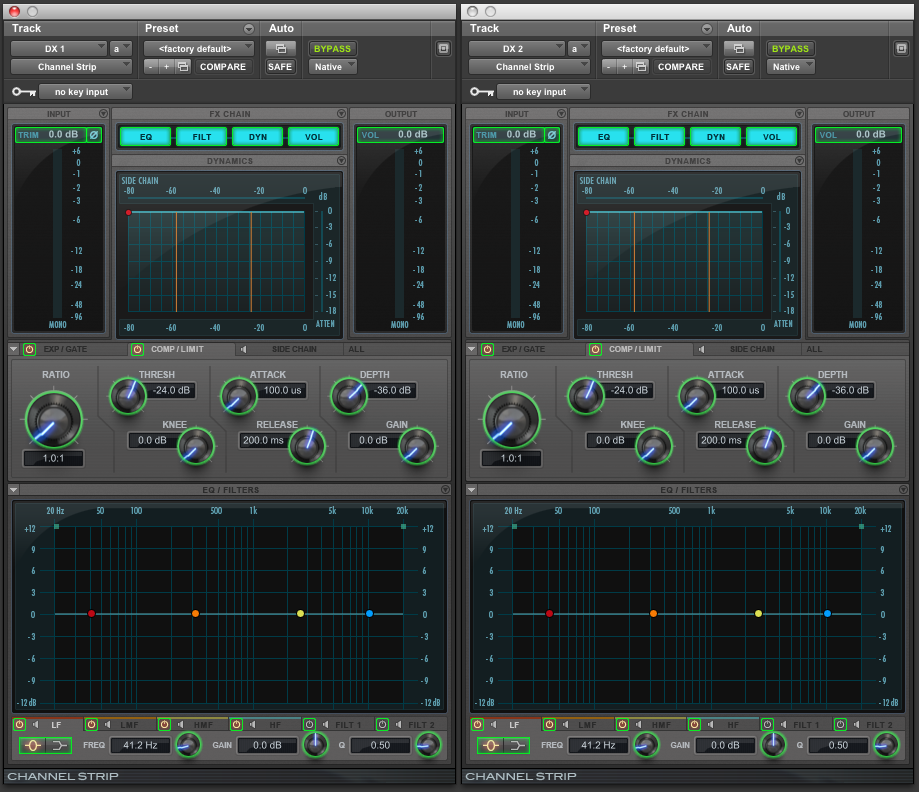
First you’ll need a few tracks that have the same plugin inserted on corresponding insert points. That is to say, if the EQ is on insert A on the first track, the matching plugin needs to be on insert A on the second track. Like so:
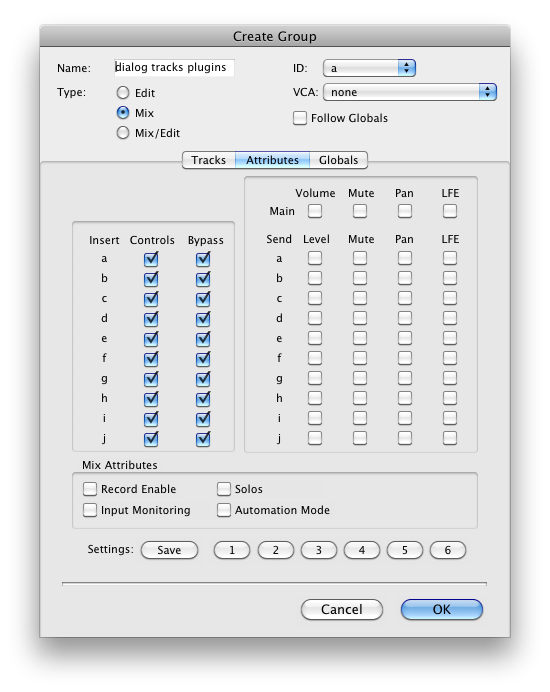
In this case there are two instances of the ChannelStrip plugin on the “A” insert point. The next step is to group the two tracks. You can do this by first selecting the tracks you want to group and then going to the Track menu and selecting “Group” or using shortcut “cmd-G.” This brings up the “Create Group” dialog box, like this:
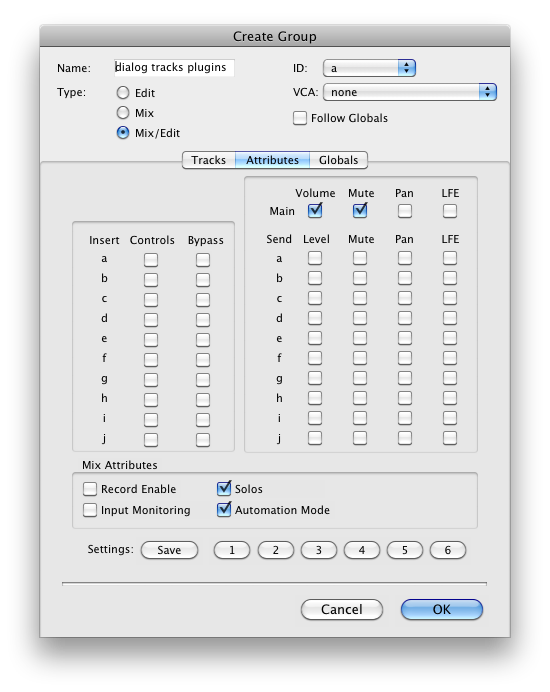
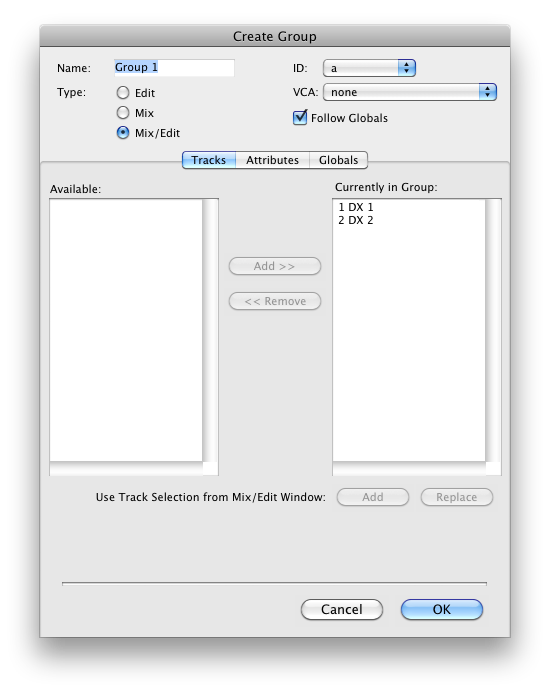 Note that your selected tracks are listed on in the right-hand column (“Currently In Group”). First you should name the group something unique and useful (such as “dialog tracks plugins”). Next, uncheck the “follow globals” box. Then go to the attributes tab, like so:
Now you can choose which aspects of the tracks you’d like to group. First off let’s make it a mix group only; no need to link the tracks on the edit window. Next we are primarily interested in grouping the plugin controls and bypass, so let’s check that for each insert point. We can also uncheck all other options, so that the only purpose of this mix group is to link our plugins. So here’s how things should look:
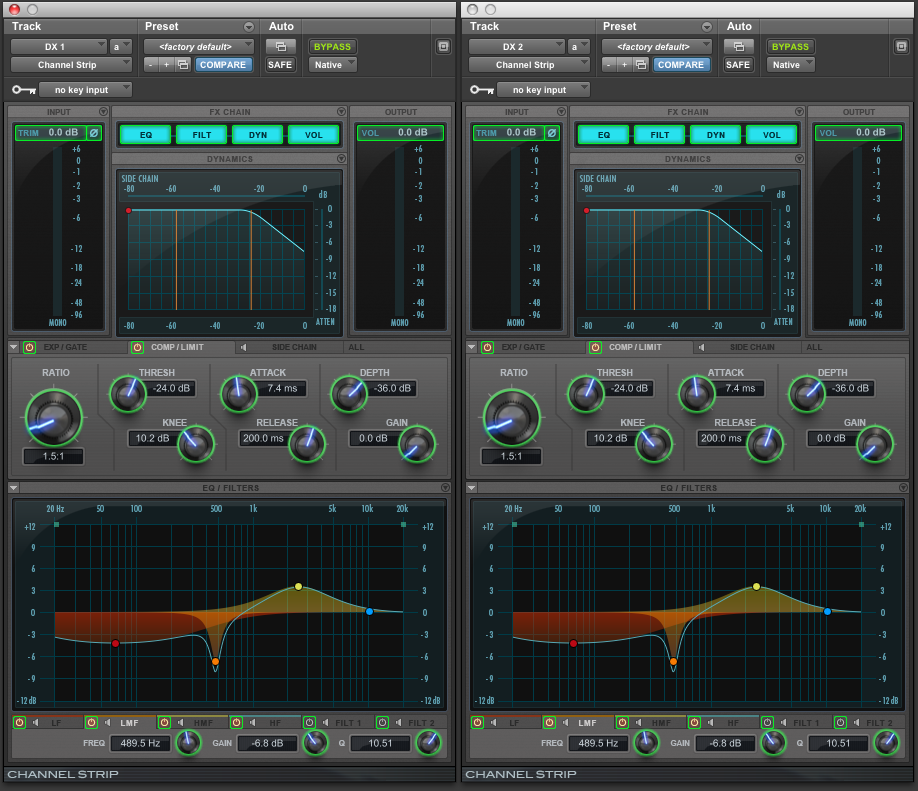
And that’s it! At this point, any change I make to one plugin in this group will be replicated on all other plugins in the group. This will be true if I control a parameter with the mouse, recall a preset, or adjust parameters on a control surface.
So any changes made to this default setup on the one instance of the plugin will be mirrored on the other:
This can be incredibly helpful when linking reverbs, setting limiters, adjusting input gain on EQs, applying matching EQ curves to a whole scene’s worth of production audio, adjusting compressors, and any other situation where changing two or more plugins to the same setting would be useful. So go ahead and link some plugins!


Another great tip. Haven’t used this before for perspective cuts but will now.
This tip is really great! Unfortunately, though, only available with Pro Tools HD… Isn’t there another way to achieve this?
Can this be done in the opposite direction? I’d like to be able to do a Emphasis/De emphasis pre/post saturation, or distortion, or reverb. Pro Tools is way behind the game when it comes to user customization, Reaper is amazing in this regard.
To clarify, I’d like to be able to move an EQ parameter into positive gain, while the linked plugin responds with negative gain of equal value.
Great tip. Thank again Alexey.